
[Buying guides]
Bottle Labeling Equipment: Check the Line Interface
Hand loading a bottle labeler can add downtime to a continuous filling line. Match your bottle labeling machine to bottle holding, label format and conveyor interfaces before comparing speed.
Updated October 2026
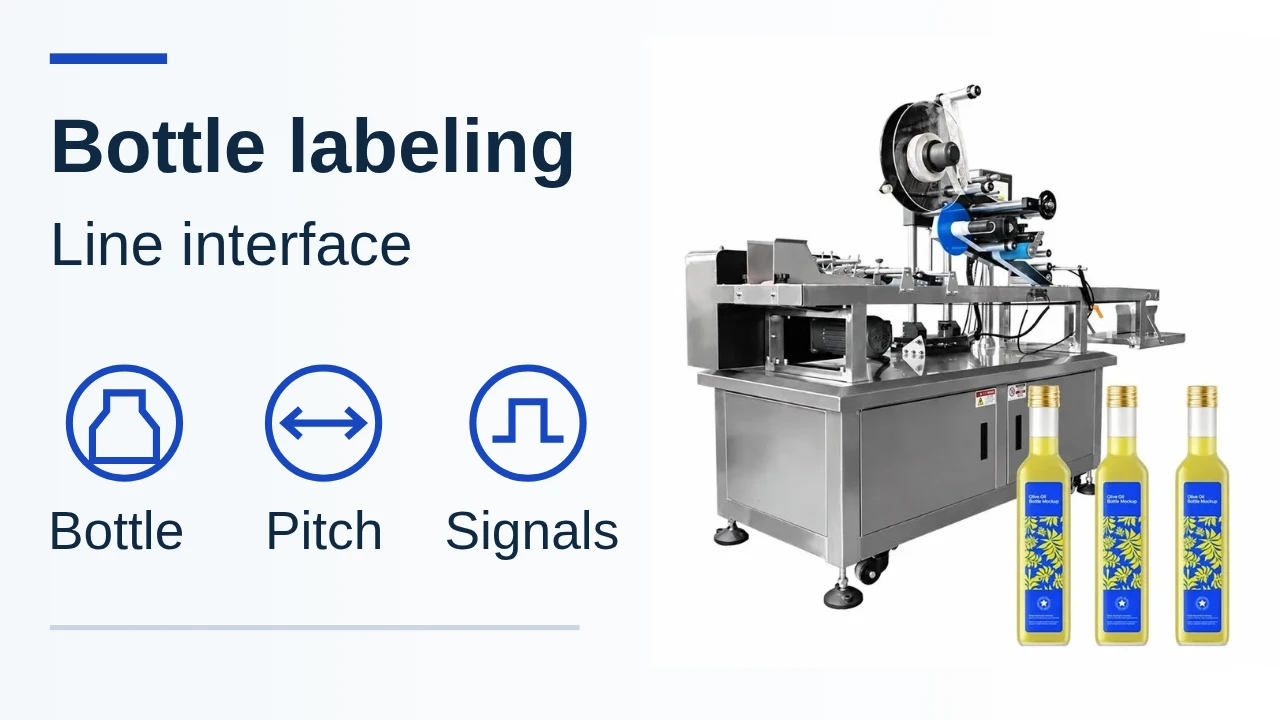
Quick inputs for the line connection
Scroll across to read all three columns.
| Input or item | Value or source to supply | Why it matters |
|---|---|---|
| Bottle geometry | Drawing and filled-container photos | Sets rotation, face positioning and support. |
| Label stock and position | Printer specification and applied-label drawing | Sets application, pressing and sensing requirements. |
| Arrival and discharge | Format-specific rate and conveyor measurements | Defines pitch, transfer and queue behavior. |
| Controls and inspection | Existing interface drawing and required checks | Defines pause/restart and reject ownership. |
Define the bottle path before the applicator
A bottle labeling machine can automate label application while an operator still loads and removes each bottle. For continuous bottle labeling equipment, specify how filled, capped bottles enter, separate, stay oriented and leave the station, together with the signals that pause neighboring machines. We use those requirements to discuss the labeling stage within your liquid filling line.
This guide covers pressure-sensitive labels on bottles and jars after filling and closing. We build lines to order; holding parts, drying, coding, inspection and rejection belong in the agreed supply scope for your formats. Shrink sleeves and glue-applied labels need a different material and process review.
Match bottle shape, holding and label placement
Choose the container-handling arrangement from the filled bottle and applied-label drawing. The number of labels alone does not establish compatibility.
| Bottle and label layout | Holding and positioning to specify | Dominant Failure Mode & Prevention |
|---|---|---|
| Round body, wrap-around label | A wrap around labeling machine turns the container as it applies and presses the label. Record diameter, usable straight-sided label height and filled stability. | Skew or a lifting trailing edge: review rotation, label geometry and pressing contact together. |
| Round body, separate front and back labels | State the angular relationship between labels and whether either must align with a seam, handle or existing mark. | A consistent label-to-label gap can still leave artwork facing the wrong direction. Specify the reference feature and orientation requirement. |
| Flat, oval or square bottle, two panel labels | A front and back labeling machine must present the intended faces and keep the bottle steady through both application points. Identify guides, centering and any top holding arrangement. | Yaw or movement between heads shifts the second label. Review bottle restraint and panel geometry; do not assume round-bottle rotation will hold a flat face. |
| Tapered body or a label crossing a corner | Provide the actual applied-label drawing and bottle contour for a handling and label-material review. | Wrinkles or edge lift where curvature changes: confirm label shape and pressing arrangement before ordering rolls. |
Record label face material, adhesive, dimensions, liner gap, roll/core diameters and winding direction with each format. Transparent labels also need a compatible detection method agreed with the labeler supplier.
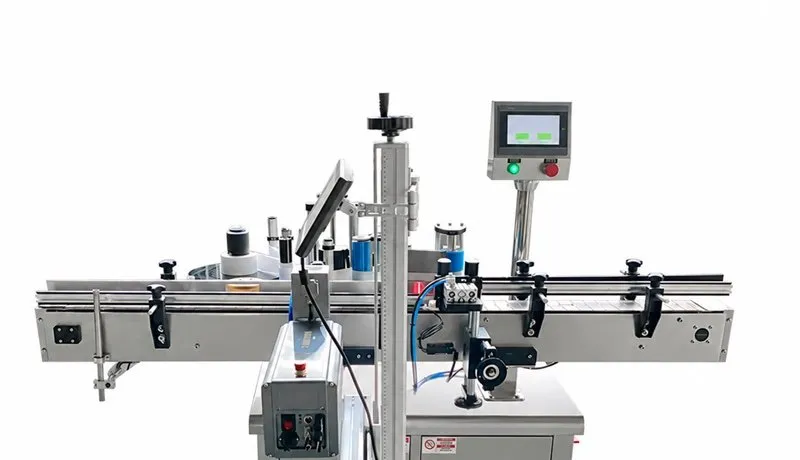
A round-container station has its own handling path
Match bottle spacing to arrival rate
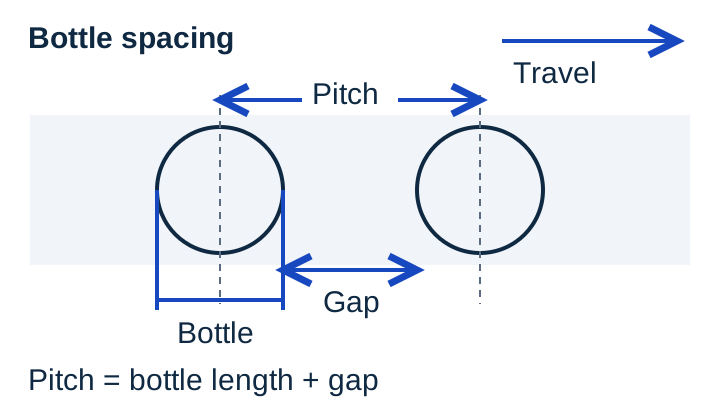
Spacing is measured along the conveyor travel direction. Center pitch is the distance between corresponding points on consecutive bottles; clear gap is pitch minus the bottle dimension along travel. Ask how the proposed labeler establishes that spacing: a separating belt, timing screw or other format-specific mechanism may be proposed. A screw needs the bottle format, change parts and speed relationship defined; it is not a default accessory.
For steady single-file flow without slip, center pitch p = v / q, where conveyor speed v is in m/min and arrival rate q is in bottles/min; p is metres per bottle position. Clear gap g = p − d, where d is the bottle dimension along travel in metres.
Measure conveyor speed under the same operating condition as the bottle arrival rate. Compare the resulting pitch and clear gap with the spacing mechanism, sensor response and application cycle, using the actual bottle orientation and dimension along travel.
Center pitch includes the bottle and the gap
Set the buffer and recovery boundary
If the required incoming rate exceeds the labeler’s supported rate for that bottle and label, the queue grows during continuous running. If the rates are equal, a queue formed during a stop cannot shrink while both keep running. Recovery requires labeler running rate above the continuing arrival rate, or a planned reduction or pause upstream.
For constant arrivals, buffer positions = incoming bottles/min × interruption seconds / 60. When the supported downstream rate exceeds continuing arrivals, recovery minutes = queued bottles / (downstream bottles/min − incoming bottles/min). Use observed interruptions and rates for the same format.
Translate the buffer count into usable container positions, allowing for actual spacing, transfers and stable contact. Define the upstream stop response when storage fills. Add these waiting and transfer areas to the line layout inputs.
Check the surface at the point of label contact
Water, oil or product residue on the bottle can undermine label contact. Inspect the body after filling, closing and any cooling or washing step, rather than judging an empty bottle at room temperature. Record surface temperature and the location of moisture or residue, including whether condensation returns between heads.
For wet bottles, discuss drying with the label-material and line suppliers before the peel point. Avery Dennison’s Z3338 Adhesive Technical Overview, sections 5–6, recommends air knives close to initial label contact and effective wipe-down for that cold/wet adhesive application. Excess water can cause sliding, so check contact and adhesion using the selected adhesive and bottle condition.
Air drying does not establish that an oily surface is ready for labeling. Define residue control and the adhesive choice separately. Agree where to inspect for bubbles, skew and lifted edges, including after the specified storage or cooling condition. Increasing roller pressure alone cannot resolve every material or surface mismatch.
Write the continuous-line handover checklist
Give each row a named supplier or site owner and an open/closed status in your project record. Operational handshakes in this table do not define emergency-stop or guarding circuits; the responsible machinery team must define those separately.
| Interface field | Record or ask for | Failure or response to resolve |
|---|---|---|
| Capper discharge to labeler infeed | Conveyor height and adjustment range, travel direction, belt/slat type, transfer gap and guides, using measurements and end-on photos. | Bottle tipping, snagging or loss of face orientation at the transfer; assign the transfer hardware supplier. |
| Arrival pattern and separation | Running rate on each format, arrival bursts, required pitch, holding method and timing-screw/change-part scope if proposed. | Touching bottles or irregular arrivals disrupt detection and application; agree spacing before the label head. |
| Bottle condition | Filled mass, cap/pump protrusions, body temperature, moisture, oil and stability through guides. | Wrong holding contact or a wet/oily surface causes movement or adhesion trouble; define handling and surface preparation. |
| Operational signals | Ready/run permission, stop request, infeed empty and discharge full; interface drawing, signal meanings, response and restart owner. | A blocked labeler continues receiving bottles, or restart releases a surge. Agree which neighboring units pause and resume. |
| Label roll and coder | Roll drawing, label orientation, sensor compatibility, variable print content and where printing occurs. | Correct application with wrong artwork or code: specify format selection and code verification separately. |
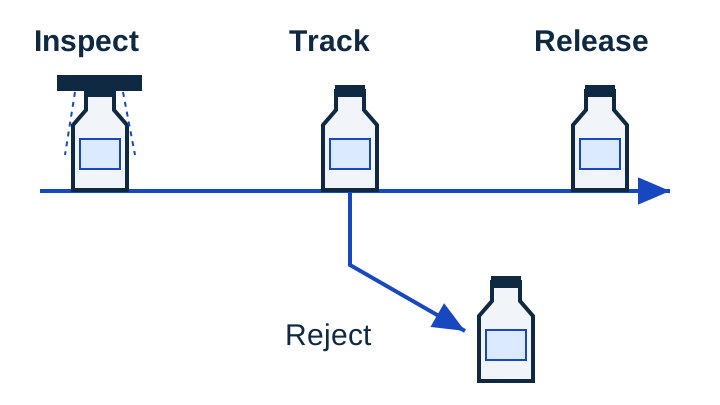
| Inspection and rejection | Label presence/position and code checks required, inspected bottle tracking, reject location and reject confirmation if specified. | The camera detects a fault but the wrong bottle leaves the line. Assign tracking, rejection and the response to a failed reject. |
Follow the inspected bottle to its disposition
Agree observable acceptance situations
Set placement tolerances, code content, adhesion conditions and the run duration before acceptance. Ask the supplier to demonstrate the agreed abnormal conditions under a controlled acceptance procedure; do not improvise faults on a running line.
| Condition to include | Observation and record | Response to agree |
|---|---|---|
| Normal production for each agreed format | Container/label revisions, material batches, running time, processed count, accepted count and causes of rejection. | Compare accepted output and placement against the signed specification, including the agreed storage/adhesion check. |
| Label supply low or reel exhausted | What the operator sees and which bottle is at the applicator when labels stop. | Define alarm and upstream pause behavior; identify any unlabeled bottles before release. |
| Downstream blocked or infeed empty | Buffer state and bottle position at the transfer, with stop and restart sequence recorded. | Verify the agreed pause/restart behavior and bottle spacing after restart. |
| Known wrong/missing label or unreadable code | Inspection result and the identity of the bottle reaching the reject point. | Confirm the intended bottle is handled correctly and the response when a reject is not confirmed. |
| Format or material change | Changed guides, holding parts, screw if fitted, roll direction, recipe and first accepted packs. | Use the same acceptance criteria after the change; record adjustments and unresolved deviations. |
Compare the same month of ownership cost
Use a common production quantity, format mix and accounting period. Compare purchase and integration scope with the filling line cost guide, then add operating costs for that same basis.
| Cost input | Record for every quotation | Why the interface changes the cost |
|---|---|---|
| Label and liner consumption | Production labels, setup/splice waste, rejected labels and disposal costs. | Bad spacing or contact can consume labels while bottles remain unacceptable. |
| Changeover time | Changes/month × minutes/change, including guides, holding parts, roll and coder setup. | A new bottle may change multiple stations, even when the label head stays. |
| Rework and lost packaging | Affected packs, recoverable bottles/product, replacement labels and rework labor. | Separate a relabeling job from an unrecoverable filled-bottle loss. |
| Drying and inspection | Quoted equipment, utilities, service and wear items over the same month. | An air knife, coder or reject station changes the supply scope and operating inputs. |
| Stops and integration | Recorded stop time and the quoted transfer/control work. | Avoid charging the same stopped minutes both as lost contribution and again as an identical output loss. |
Period ownership cost = allocated equipment/integration cost + labor + utilities + consumables/service + unrecoverable loss. State the allocation period for capital costs and use your own quoted amounts.
Calculate Changeover and Relabeling Quantities
Changeover hours per month = sum of measured stopped minutes / 60. Include guides, holding parts, roll changes, coder setup and first-label checks, recording concurrent tasks once. Apply actual staffed hours and labor rates to the work performed.
Relabeling quantity = processed bottles × measured relabeling fraction. Replacement-label quantity = affected bottles × labels replaced on each affected bottle, plus recorded setup waste. Price stock, removal work and unrecoverable product or packaging separately for the same accounting period.
What to send us
Copy these fields into your message. Add the filling line RFQ checklist for the wider product, site and project scope.
| Item | Why we need it | Example format |
|---|---|---|
| Bottle and filled condition | Review rotation or face positioning, holding and transfer stability. | Dimensioned drawing, material, filled mass and front/side/base photos. |
| Label and applied position | Review geometry, stock, sensing and roll compatibility. | Applied-label drawing plus printer roll specification and adhesive datasheet. |
| Surface condition | Identify moisture, oil and drying requirements before contact. | Temperature and residue description at labeler infeed, with photos. |
| Existing line and target output | Discuss transfer hardware, pitch, buffering and operational signals. | Capper/packer details, interface drawings, conveyor measurements and bottles per shift. |
| Coding, inspection and acceptance | Define the optional checks and disposition of rejected bottles. | Required print content, position limits, adhesion conditions and named action owners. |
Apply the Material and Interface Guidance
Avery Dennison’s Z3338 adhesive recommendations link cold/wet application performance to material selection, surface water, initial contact and wipe-down. Retain the selected adhesive datasheet and bottle-surface condition with each label format.
LINEVO’s labeling guidance connects the container and label to handling, while its line planning guidance connects transfer heights, rate basis and operational signals. Use the handover checklist and acceptance situations above for that combined task.
[Sources]
- LINEVO labeling: container handling, label formats and connected stations. linevopack.com/machines/labeling
- LINEVO packaging-line planning: station scope, common count basis, transfer interfaces and system acceptance. linevopack.com/solutions
- Avery Dennison Z3338 Adhesive Technical Overview, sections 4–6: materials, cold/wet surface contact and wipe-down. graphics.averydennison.com/content/dam/averydennison/lpm/na/en/doc/home/resource%20center/technical%20marketing%20bulletins/1805%20Z3338%20Technical%20OverviewV4%20%281%29.pdf
[Request]
Discuss the labeler within your filling line
Use the handover checklist for the labeling-line discussion, linking each format to its surface and acceptance conditions.
Our team reviews your product, container and line requirements with you.
[Keep planning]
- Liquid Filling LinesFoam, drip or a narrow bottle opening can make the wrong filler a poor fit. Start with liquid behavior and container dimensions, then match the filling and downstream stations.
- Line LayoutPlan filling line space around product movement, machine interfaces, operation and service access. The final layout should connect the selected equipment with actual site dimensions, utilities and the move-in route.
- Filling Line CostCompare filling line prices after matching the stations, formats, integration and delivery scope. Then add installation, site work and operating costs on the same accounting basis.
- RFQ ChecklistPrepare a filling line RFQ with the product, container and closure, required accepted output, site layout and delivery scope. A shared brief lets engineering define each station and its interfaces on the same basis.